Jun. 22, 2022
This is one of the most common questions that plant personnel ask when it comes to issues on butterfly valves. We know how frustrating it is when you come across a problem like this, especially if it is a newly purchased item and you’d expect the best from it. Even with a few liters of volume leakage can potentially hurt your expenses.
Don’t panic when this is your case, as some butterfly valve issues can be easily solved due to their simple geometry and design. However, some leakage problems would require complete valve overhaul so be mindful that not cases are the same.
We have seen and solved many of these varying cases on which some have helped us improve our design and manufacturing process for our range of high-performance butterfly valves. In this article, we have enumerated a number of ways you can troubleshoot a leaking butterfly valve.
Before you figure out how to fix a leaking butterfly valve, you must first analyze the following questions. This is so you can think about if fixing the leakage is even significant or would just cost you unnecessarily huge expenses that is not really worth it.

Butterfly valves have allowable leakage tolerances and it can differ from application to application. While zero leakage may sound desirable, from an engineering standpoint, it is not always the case and many butterfly valves do leak at some point.
This is especially true when the medium is gas such as helium. Small amounts of gases may easily escape but are nonetheless contained.
Metal seated butterfly valves have allowable leakage rates under FCI 70-2 (Class VI). Bubble tight shutoff valves are the tightest sealing valves in the family, but also allows an acceptable amount of bubbles to leak through.
Some installed butterfly valves are oversized or undersized and they may be the cause of leakage.
Ensure that the valve you install has the correct size and pressure rating for the application. It should be noted that the pressure rating capability of the valve is determined by the sum of the interference of the disc and seat assembly and the interference of the rubber movement. Any misalignment during installation can change its pressure rating capability which can lead to valve leakage.
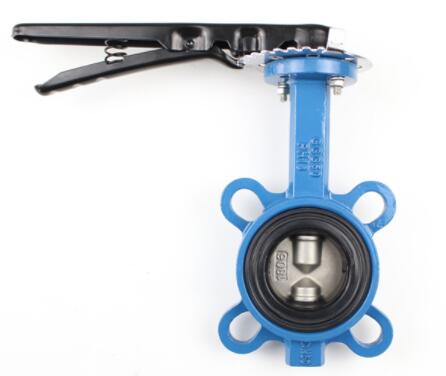
There are different types of butterfly valves such as lug style, wafer, double-flanged and they also vary in material. Make sure that you are using the right type for your application. Some valves are meant for silt and sand while others are only suitable for gases. Make sure that you follow the manufacturer’s guide on what it is meant for.
One of the most common reasons why valve leakage causes huge losses in the system is because maintenance schedules and procedures are not followed. Regular valve testing should be implemented in your plant. This is to know if the leakage is great enough to cause damage to your system. This is also to check the stem if it has scored or if the seat has been worn.
See if the valve orientation is acceptable. You can look at this in the manufacturer’s manual. If a butterfly valve is installed in a horizontal pipe but is designed for a vertical pipe, If it is installed in a horizontal pipe but is specified for vertical pipe there will be a huge load on its y-axis. Wrong orientation can cause leakage.
A strainer is usually built before the medium passes through the butterfly valve. This is to filter out large particles that can damage the valve components. Make sure that the strainers are well maintained.
API Standard 598 is a valve seat leakage standard that covers leakage requirements for all types of valves including butterfly valves, both metal and soft seated. Was this followed during the installation?
Butterfly valves are commonly used as shutoff valve and flow control valves. As a shutoff valve, it functions to block the passage of fluid in its closed position and prevent any sort of leakages. Not only should it efficiently seal the pipe and the flange to prevent internal leakages within the piping system, but also eliminate fugitive leakages escaping from the valve to the atmosphere.
There are many reasons why butterfly valves leak. This can be one of the following:
● Valve seats are covered in dirt or the valve stem and the disk is rusted.
● Seat is scored.
● Seal is damaged.
● Insufficient actuator movement.
Common causes of leakage to the atmosphere:
● Worn stem packing.
● Gasket between valve body and bonnet is damaged.

Do one of these remedies first, if possible.
There can be many assumptions for a leaking butterfly valve and there's no guarantee that one problem can be addressed with a generalized solution, but here, we present the most common problems with a few remedies you can do to solve the problem.
| Leakage | Probable Cause | Solution |
Leakage occurs between the actuator and butterfly valve | Packing leak | · Clean the packing bore.· Replace packing if necessary. |
| Difficulties in actuating or operating the valve. | · Debris or material is stuck. · Eroded parts. · Actuator is loose. | · Apply grease in the actuator.· Clean and remove the seat and stem. · Apply thread locker or loctite before tightening the bolts. |
Butterfly valve can’t open or close tightly and leakage occurs.Image courtesy of Kelly Paffel | · Solenoid might be stuck.· Supply pressure of air might be less than 5kg. · Air is leaking out of the pneumatic actuator.. · The limit switch is loose causing the wrong opening and closing position of the valve. | · Try using an air pipe to directly blow in air in the pneumatic actuator to see if it works normally. · If it is normal, then it might be solenoid valve which has an issue. Replace the solenoid valve. · Supply 6 kg of air pressure.· Replace the actuator. · See if the problem is solved by resetting the pneumatic actuator end stop position. |
The butterfly valve leaks when closing | · The disk may not be fully closed. · There is a wear on the disk surface. · There is a wear on the elastomer seat. | · Initiate maintenance of the component. · Replace valve seat. · Re-adjust the actuator end stop. |
Automatic valves does not actuate | · Power source is damaged. · Damaged wires, connectivity issues. | · Check the power source; replace burnt or damaged fuse; reset the system. · Inspect the signal sequence of the actuator. · Repair/replace motors, relays or solenoids. |
| Leakage in the seat seal | · Debris or foreign materials | · Check whether the valve is 100% sealed · Check whether the actuator closes at maximum torque, open/close the valve under pressure and increase torque · If valve continues to leak, replace seat seal |
On a more serious situation, if leakage persists, then a more intuitive investigation should be carried out to solve the problem.
Inspect the condition of the butterfly valve parts upon removing them.
When you see score marks on the face of the lining, this might mean that the disc was not well installed at the very beginning. This causes a scratching effect on the layer of the lining seat during closing position which results in leakages. To make matters worse, traveling solid particles might have caused recurring impacts on the leakage surface. This eventually decreases the service life of the butterfly valve.
For this case, the butterfly valve seat liner should be replaced if the amount of leakage is beyond the set tolerance and the seat has too many deformities. In your installation, make sure that the seat (O-ring) induces a high pressing action for secure sealing. Also, make sure that the actuator end-stops are properly set this time to avoid misalignments.
If the damaged seat can be salvaged, a simple actuator adjustment can be done to re-align the disc and stop the leakage.
First is to cut out all power sources from the pneumatic or electric actuator. After which, you can loosen the hex screws and nuts.
If you see that the seat is damaged, replace it. Remove the disk, followed by the seat. Then remove the bushing and its plug before rotating the disc into its open position. Compress the seat to detach it from the lining then pull it out carefully away from the spindle.
Before placing the new seat, lubricate the stem and the seat first. At the butterfly valve open position, insert the stem in seat slot. Then, sandwich the disk and seat between two flanges at its open position. Finally, return the bushing.
Do a visual check and make sure that the proper tightening torques are followed.
After mounting the flanges, install the actuator and test if the butterfly valve open and close flawlessly with the allowable interference. Make sure that the correct valve body configuration, liner and bushing alignment are followed. Finally, connect the electrical supply or compressed air then test the operation of the butterfly valve if it works correctly.
In practice, isolation of butterfly valves to prevent leaking is close to impossible. The best way to prolong the life or your butterfly valve is to maintain inspection and perform regular preventive maintenance. Also, address the leakage as early as possible. “Kill” the line if necessary so you can clean the packing and valve components from any debris.
KXC group manufactures High-Performance Butterfly Valves available in a variety of material and end-connection types. We also cater OEM/ODM needs. Contact us for more queries and advice on how to optimize your valve usage.